How to Use Screen Time on Mac
Screen Time records the time you spend in different application, which includes social networking and games applications. This also includes a blocking feature to stop excessive usage. There is also a parental control feature like placing limitations on communication, especially from a particular contact. If you don’t know how to use Screen Time on Mac, then follow the instructions mentioned below.
Here’s How to Use Screen Time on Mac
Steps to Enable Screen Time on macOS
• Press on the Screen Time option located in the System Preferences.
• Click on the Options button provided at the end left-hand side of the display.
• Press on the Turn On option given at the upper right-hand side of the screen.
• Press on the Turn On option provided at the upper right-hand side of the display.
• Now, you can use Screen Time on Mac.
Steps to Disable Screen Time on macOS
• Press on the Screen Time is given in the System Preferences menu.
• Press on the Options button provided at the end left-hand side of the display.
• Press on the Turn Off option located at the upper right-hand side.
Steps for Sharing Screen Time on Your Mac Across All Devices
• Press on the Screen Time provided in the System Preferences window.
• Choose the Options button provided at the end left-hand side.
• Go through the Share Across Devices check box.
Steps for Adding Passwords to Screen Time on Your macOS
• Press on the Screen Time is given in the System Preferences window.
• Choose the options button provided at the end left-hand side.
• Go through the Use Screen Time Password checkbox.
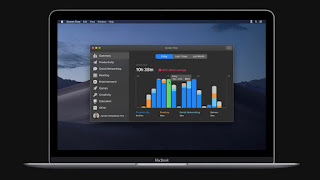
Steps for Viewing App Usage in Screen Time on Your Mac
• Press on the Screen Time provided in the System Preferences menu.
• Choose the App Usage option located on the left-hand corner of the display.
Steps for Viewing Notifications Sent Screen Time on Your Mac
• Press on the Screen Time by going to the System Preferences window.
• Choose the Notifications option given on the left-hand corner of the menu.
Steps for Viewing Pickups in Screen Time on Your Mac
• Choose the Screen Time located in the System Preferences window.
• Choose the Pickups option located on the left-hand corner of the display.
Steps to Schedule Downtime Through Screen Time for Your Mac
• Press on the Screen Time is given in the System Preferences option.
• Choose the Downtime provided on the left-hand side of the screen.
• Press on the Turn On option for activating the Downtime on your Mac.
• Choose the Every Day or Custom option, which depends on the schedule which you want to change.
Steps for Setting Limits Through Screen Time for Your Mac
• Select the Screen Time by going to the System Preferences menu.
• Choose the App Limits option provided on the left-hand corner of the display.
• Press on the Turn On option for activating App Limits.
• Choose the Plus symbol for adding the app category.
• Go through the checkbox near to an app category which you wish to set a limit.
• Now, you need to start setting limits through radio buttons.
Source url:- http://sy-norton.com/how-to-use-screen-time-on-mac/
Ava Williams is a Norton product expert and has been working in the technology industry since 2002. As a technical expert, Ava has written technical blogs, manuals, white papers, and reviews for many websites such as norton.com/setup.

Here’s How to Use Screen Time on Mac
Steps to Enable Screen Time on macOS
• Press on the Screen Time option located in the System Preferences.
• Click on the Options button provided at the end left-hand side of the display.
• Press on the Turn On option given at the upper right-hand side of the screen.
• Press on the Turn On option provided at the upper right-hand side of the display.
• Now, you can use Screen Time on Mac.
Steps to Disable Screen Time on macOS
• Press on the Screen Time is given in the System Preferences menu.
• Press on the Options button provided at the end left-hand side of the display.
• Press on the Turn Off option located at the upper right-hand side.
Steps for Sharing Screen Time on Your Mac Across All Devices
• Press on the Screen Time provided in the System Preferences window.
• Choose the Options button provided at the end left-hand side.
• Go through the Share Across Devices check box.
Steps for Adding Passwords to Screen Time on Your macOS
• Press on the Screen Time is given in the System Preferences window.
• Choose the options button provided at the end left-hand side.
• Go through the Use Screen Time Password checkbox.
Steps for Viewing App Usage in Screen Time on Your Mac
• Press on the Screen Time provided in the System Preferences menu.
• Choose the App Usage option located on the left-hand corner of the display.
Steps for Viewing Notifications Sent Screen Time on Your Mac
• Press on the Screen Time by going to the System Preferences window.
• Choose the Notifications option given on the left-hand corner of the menu.
Steps for Viewing Pickups in Screen Time on Your Mac
• Choose the Screen Time located in the System Preferences window.
• Choose the Pickups option located on the left-hand corner of the display.
Steps to Schedule Downtime Through Screen Time for Your Mac
• Press on the Screen Time is given in the System Preferences option.
• Choose the Downtime provided on the left-hand side of the screen.
• Press on the Turn On option for activating the Downtime on your Mac.
• Choose the Every Day or Custom option, which depends on the schedule which you want to change.
Steps for Setting Limits Through Screen Time for Your Mac
• Select the Screen Time by going to the System Preferences menu.
• Choose the App Limits option provided on the left-hand corner of the display.
• Press on the Turn On option for activating App Limits.
• Choose the Plus symbol for adding the app category.
• Go through the checkbox near to an app category which you wish to set a limit.
• Now, you need to start setting limits through radio buttons.
Source url:- http://sy-norton.com/how-to-use-screen-time-on-mac/
Ava Williams is a Norton product expert and has been working in the technology industry since 2002. As a technical expert, Ava has written technical blogs, manuals, white papers, and reviews for many websites such as norton.com/setup.
Comments
Post a Comment