How to Create a Panorama in Google Photos
Do you love capturing pictures and have a collection of them that you wish to change into a 360-degree panorama? Then you can do it with just a few clicks.
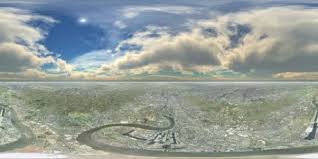
Fortunately, some of the smartphones have an inbuilt feature of shooting panoramas. It is worth noting the fact that Google Photos shall be able to make a panorama by itself, but only if the images comprise of their metadata properly.
Checking Metadata
- Firstly, see the location where the pictures of the device are saved.
- Then, do a right-click on that.
- After that, press the Properties.
- Next, press the Details option.
- Lastly, move downwards to the details of the GPS part.
Reinserting Metadata
- Firstly, launch the device’s web browser of yours.
- Then, put the net in the browser box or else press that link.
- Next, you need to drag and drop the picture that you wish editing in the bar or press on the bar for browsing the device of yours for it.
- Whenever it gets uploaded completely, press the blue exif.me switch.
- As soon as the new menu gets displayed, press the GEO Tags option.
- Next, press the GPSLatitudeRef pull-down menu.
- After that, choose the North.
- Then, put the first section of the GPS coordination into the GPSLatitude text bar.
- Next, press the GPSLongitudeRef pull-down menu.
- After that, choose the West.
- Lastly, put the second section of the GPS coordinates into the GPSLongitude text bar.
Including Panorama Tags
- Firstly, press the ‘XMP GPano Tags’ option. It shall be present above in the menu.
- Then, move downwards for searching the ProjectionType text bar and put equirectangular.
- Lastly, put True into the UsePanormaViewer text bar.
Including camera’s make as well as model
- Firstly, press the EXIF General option. It shall be present in your menu tab.
- Then, put the maker of your camera into the Make text bar.
- Lastly, put the camera model of yours into the Model text bar.
Downloading picture by reinserted metadata
- Firstly, move downwards to the end of the menu.
- Next, press the blue Go.eXifing option. It shall be updating the uploaded pictures of yours with the given metadata.
- Whenever you view the green bar of confirmation situated upper side, press the X option located in the upper right-hand side of the menu or else outside anywhere of the menu wherever you like.
Lastly, press the Download Me switch of green color under the picture of yours. It will be good to change its name so that you, by mistake don’t overwrite the original one.
Source url:-https://williamsblogpoint.wordpress.com/2020/01/28/how-to-create-a-panorama-in-google-photos/
Ava Williams is a Norton product expert and has been working in the technology industry since 2002. As a technical expert, Ava has written technical blogs, manuals, white papers, and reviews for many websites such as office.com/setup.


Comments
Post a Comment